Posts

Showing posts from March, 2020

Apply filters (Photoshop basic part-10)

Browse the Filter Gallery Select a layer that contains content you want to change. Go to the menu bar and choose  Filter > Filter Gallery . Try the different filters and adjust their settings for the desired result. Experiment with adding multiple filters in the  Filter Gallery  and changing their stacking order. Click OK to close the  Filter Gallery  and apply the filters you chose. You can also filter after you create a selection to apply filters to only the selected area.  Blur an image with Smart Filters Select a layer that contains content you want to blur, like a background. Choose  Filter > Convert for Smart Filters . Click OK. This converts the selected layer into a layer that will support re-editable filters. With the same layer selected, choose  Filter > Blur > Gaussian Blur . In the  Gaussian Blur  dialog box, adjust the Radius control until you’re happy with the amount of blur in the live preview. Click OK to apply the Gaussian Blur filter.

Combine images (Photoshop basic part-9)

Add texture to an image Start with two layers. The image with the texture you want to add should be on the top layer and the main image should be the bottom layer. In the  Layers  panel, make sure the top layer (texture) is selected. At the top left of the Layers panel, change the blend mode in the drop-down menu from  Normal  to  Overlay . This changes the way the colors in the texture layer interact with the colors on the layer below. Try out some other blend modes to find the one that looks best with your images. At the top of the  Layers  panel, experiment with decreasing the  Opacity  slider to change the look of the texture on the image.   Add an object to an image with a layer mask Start with two layers. The image with the object you want to add should be on the top layer and the main image should be the bottom layer. In the  Layers  panel, make sure the top layer (object you want to add) is selected. At the bottom of the Layers panel, click the  Add layer ma

Add text and shapes (Adobe photoshop basic part-8)

Add text In the  Tools  panel, select the  Horizontal Type  tool. In the options bar, choose a font, font size, color, and other options for your text. You can edit any of these settings later. Click on the canvas and enter a single line of text. You can also create a paragraph of text by dragging out a text box and then typing inside the box. Click the check mark in the options bar to accept the text and exit text mode. This automatically creates a new, editable type layer in the  Layers  panel. Use the  Move  tool to move your text into position in the image. Save your image in the Photoshop (PSD) format to retain the editable type layers for future editing.  Edit text To edit text on a type layer, select the type layer in the  Layers  panel and select the  Horizontal  or  Vertical   Type  tool in the  Tools  panel. Make a change to any of the settings in the options bar, such as font or text color. When you’re finished editing, click the check mark in the opti

Use color (Photoshop basic part-7)

 Work with brushes In the  Tools  panel, select the  Brush  tool. In the options bar, change the size and hardness of the brush. You can also select a different brush tip to change how the brush strokes look. An alternative way to increase brush size is to press the right bracket key( ] ) several times. To decrease brush size, press the left bracket key( [ ) several times.  Use foreground and background colors The  Brush  tool, the  Shape  tools, the  Type  tool, and other features that apply color use the color in the  Foreground Color  box at the bottom of the  Tools  panel. There are multiple ways to set the foreground color. You can select the  Eyedropper  tool and sample a color from the image, or use the  Color Picker ,  Color  panel, or  Swatches  panel. Behind the Foreground Color box is a Background Color box, where you can store another color. To switch the  Foreground  and  Background  color boxes to quickly access either color, click the double-pointed

Retouch images (Photoshop basic part-6)

Image
Remove small objects In the  Layers  panel, select the layer that contains spots or small objects you want to remove. In the Tools panel, select the  Spot Healing Brush  tool.                     In the options bar, adjust the size and hardness of the  Spot Healing Brush  tool to fit the item you’re trying to remove. Click on a spot or drag over an object you want to remove.   Add objects by cloning In the  Layers  panel, select the layer that contains content you want to copy and use elsewhere in the image. In the  Tools  panel, select the  Clone Stamp  tool.     In the options bar, adjust the size and hardness of the  Clone Stamp  tool to fit the object you’re cloning. Press the Alt key (Windows) or the Option key (macOS) and click an area of the image from which you want to copy content. Release the Alt (Option) key and drag over a new area to which you want to copy content. As you drag, the Clone Stamp tool copies content from the source and paints it into t

Make selections (Photoshop basic part-5)

Image
Learn selection basics In the  Tools  panel, select the  Rectangular Marquee  tool. Drag a rectangular selection onto the image. The area inside the animated border represents your selection To select more, click the Add to selection icon in the options bar or press Shift and drag. To select less, click the Subtract from selection icon in the options bar or press Alt (Windows) or Option (macOS) and drag. Select a layer you want to adjust. Then try applying some adjustments ( Image > Adjustments ). With a selection active, adjustments affect only the selected area of that layer. The same is true if you were to apply a filter, paint, fill, copy, or make other edits. When you’re done, deselect by choosing  Select > Deselect  or pressing Control+D (Windows) or Command+D (macOS).   Learn how to use the Quick Selection and Lasso tools Use the Quick Selection tool In the  Tools  panel, select the  Quick Selection  tool. Drag over an area you want to select. This 

Adjust the image quality (Photoshop basic part-4)

Image
Adjust brightness and contrast In the menu bar, select  Image > Adjustments > Brightness/Contrast . Adjust the  Brightness  slider to change the overall brightness of the image. Adjust the  Contrast  slider to increase or decrease image contrast. Click OK. The adjustments will appear only on the selected layer.  Adjust color vibrance In the menu bar, select  Image > Adjustments > Vibrance . Experiment by adjusting the sliders. The  Vibrance  slider affects the intensity of colors. It has the strongest effect on muted colors in the image. The  Saturation  slider increases the color intensity of all colors in the image. Click OK when you’re done.   Adjust hue and saturation In the menu bar, select  Image > Adjustments > Hue/Saturation . Experiment by adjusting the  Hue, Saturation, and Lightness  sliders. Your changes will affect all the colors in the image. The  Hue  slider changes the colors in an image. The  Sa

Work with layers (Photoshop basic part-3)

Image
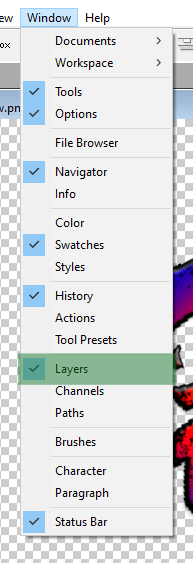
Understand layers Layers contain the images, text, or objects that make up a layered file. They let you move, edit, and work with content on one layer without affecting content on other layers. Layers are arranged in a stack in the  Layers  panel, which is usually located in the bottom right of the work area. If the Layers panel is not visible, choose  Window > Layers. In the Layers panel, click the eye icon to the left of a layer to hide its content. Click again in the same spot to reveal the content. This is a useful way to remind yourself what’s on a particular layer. A layer must be selected in order to make changes to it. In the  Layers  panel, click once to the right of a layer name to select that layer. To add more layers to your selection, hold Control (Windows) or Command (macOS) as you click other layers.  Learn layer basics Drag a layer up or down in the Layers panel to change the order of layered objects in the image. Click the  Create a New Lay