Work with layers (Photoshop basic part-3)
- Layers contain the images, text, or objects that make up a layered file. They let you move, edit, and work with content on one layer without affecting content on other layers.
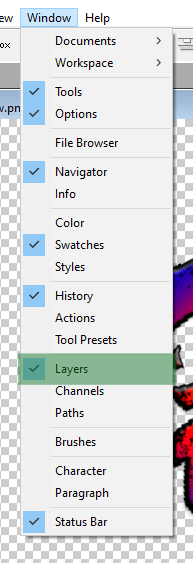
- Layers are arranged in a stack in the Layers panel, which is usually located in the bottom right of the work area. If the Layers panel is not visible, choose Window > Layers.
- In the Layers panel, click the eye icon to the left of a layer to hide its content. Click again in the same spot to reveal the content. This is a useful way to remind yourself what’s on a particular layer.
- A layer must be selected in order to make changes to it. In the Layers panel, click once to the right of a layer name to select that layer. To add more layers to your selection, hold Control (Windows) or Command (macOS) as you click other layers.

Learn layer basics
- Drag a layer up or down in the Layers panel to change the order of layered objects in the image.
- Click the Create a New Layer icon at the bottom of the layers panel to make a new layer. This layer is transparent until something is added to it.

- To name a layer, double-click the current layer name. Type a new name for the layer. Press Enter (Windows) or Return (macOS).
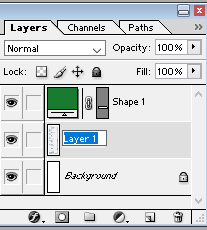
- To change a layer’s opacity, select a layer in the Layers panel and drag the Opacity slider located near the top of the Layers panel to make the layer more or less transparent.
- To delete a layer, select a layer in the Layers panel and press Backspace (Windows) or Delete (macOS).
Resize a layer
- In the Layers panel, select one or more layers that contain images or objects you want to resize.
- Choose Edit > Free Transform. A transform border appears around all the content on the selected layers. Hold the Shift key to avoid distorting the content, and drag the corners or edges until it is the desired size. Drag inside the transform border to move the content around the image. Drag outside the transform border to rotate the content.

- Click the check mark in the options bar or press Enter (Windows) or Return (macOS) to finalize the change.
Add images to a layered design
- Choose File > Place Embedded, navigate to an image file in File Explorer (Windows) or Finder (macOS), and click Place.
- Hold the Shift key to avoid distorting the image, and drag the corners of the image border to resize the added image.
- Drag inside the border to position the added image where you want it.
- Click the check mark in the options bar to finalize the placement. This automatically creates a new layer containing the added image.

Unlock the Background layer
- Because the Background layer is locked, it can’t be moved in the Document window or rearranged in the Layers panel, and some editing functions won’t work on it.
- To change the Background layer into a regular layer, click the lock icon to the right of the layer name in the Layers panel.


Comments
Post a Comment